
A support request arrives while you are away from your usual workstation. You need to inspect an Azure subscription, check a resource group, and export an inventory—but the available computer does not have Azure CLI or PowerShell modules installed.
This Azure Cloud Shell tutorial shows how to use Azure’s browser-accessible terminal without configuring a local administration environment. Cloud Shell provides an authenticated session, but your permissions, subscription selection, and storage choices still determine what you can safely accomplish.
You’ll configure a session, run commands, create a small practice resource group, and understand how to preserve files and troubleshoot access problems.
Azure Cloud Shell Tutorial: Choose Your Session
Azure Cloud Shell is an interactive terminal for managing Azure resources. Microsoft maintains the environment and includes common administration tools.
You choose Bash or PowerShell. Both run in a Linux-based environment; PowerShell in Cloud Shell is not a Windows desktop session.
| Choice | Best fit | Important distinction |
|---|---|---|
| Bash | Azure CLI commands and shell scripts | Uses Bash syntax and Linux utilities |
| PowerShell | Az module commands and object-based scripting | Uses PowerShell syntax and pipelines |
| Ephemeral session | Quick investigations and short exercises | Local files disappear when the session ends |
| Persistent storage | Reusable scripts and working files | Azure Files storage charges apply |
Bash and PowerShell are shells—the environments interpreting commands. Azure CLI is the az command-line tool; Azure PowerShell uses cmdlets such as Get-AzResourceGroup.
For a broader comparison, see Azure PowerShell vs. Azure CLI.
Cloud Shell is intended for interactive administration. Sessions time out after 20 minutes without interactive activity, so it is not a dependable host for scheduled jobs or unattended deployments.
Pro Tip: I would use Cloud Shell for investigation and controlled maintenance, then move repeatable unattended work into an automation service or deployment pipeline.
Start Cloud Shell and Configure Storage
You need an Azure account with access to an appropriate subscription. A subscription provides a billing and governance boundary; it is not simply a folder for commands.
Launch an ephemeral session
- Sign in to the Azure portal.
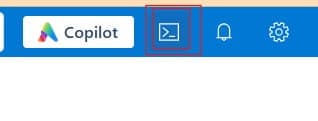
- Select the Cloud Shell icon in the top navigation.
- Choose Bash for this tutorial’s CLI examples.
- In Getting started, select No storage account required.
- Select the intended subscription.
- Click Apply.
See the screenshot below for reference.
This starts an ephemeral session without creating a storage account. Files saved in that session do not survive its termination.
If setup reports that the resource provider is unregistered, ask an authorized administrator to register Microsoft.CloudShell under the subscription’s Resource providers settings. Resource providers expose Azure service capabilities; registration requires suitable permissions.
Choose persistent storage when needed
For reusable files, select Mount s